
Sewing machine cover
I spotted this amazing fabric about a week ago and immediately began thinking about what I could possibly make with it in order to justify buying it (know that feeling too?!). Then I read a post on Tilly Walnes’ blog about keeping sewing machines dust free, and decided that it would be perfect as a sewing machine cover for my Janome Sewist 525S. It gets moved around our house a lot and seems to collect dust very easily! I also started work on a sewing project which uses black fabric, and realised that my thread was picking up all the dust from inside my machine…so a cover is definitely needed!
I decided that I’d make a quilted cover, so chose some white fabric for the inside lining – it didn’t really need to be jazzy because no-one will see the inside! For the binding I picked out the pale aqua colour to co-ordinate, and got myself a bias binding-making tool too.

The first thing that I did was measure my machine with its plastic cover on – I measured from the middle of the front to the back, and then the width of the front. I also measured the width and height of the side. When I had the measurements I drew out some templates on craft paper, and to get the shape of the side pieces just right I drew around the side of the cover.

Once the templates were cut out, I then cut out all the pieces of fabric and wadding. I layered up the side pieces first and then pinned them together.

I tried out my quilting guide attachment for the first time today, and it’s brilliant for sewing evenly. I haven’t used it before because I’ve only ever used thicker polyester wadding, and not this thinner cotton wadding. I love the thinner stuff – it’s much easier to sew with! I decided to stitch between every other row after experimenting on some scrap pieces.

Once I had quilted the side pieces, I did the same with the large rectangular piece. This larger piece needed more pins to keep it all together, but I quilted it in the same way.


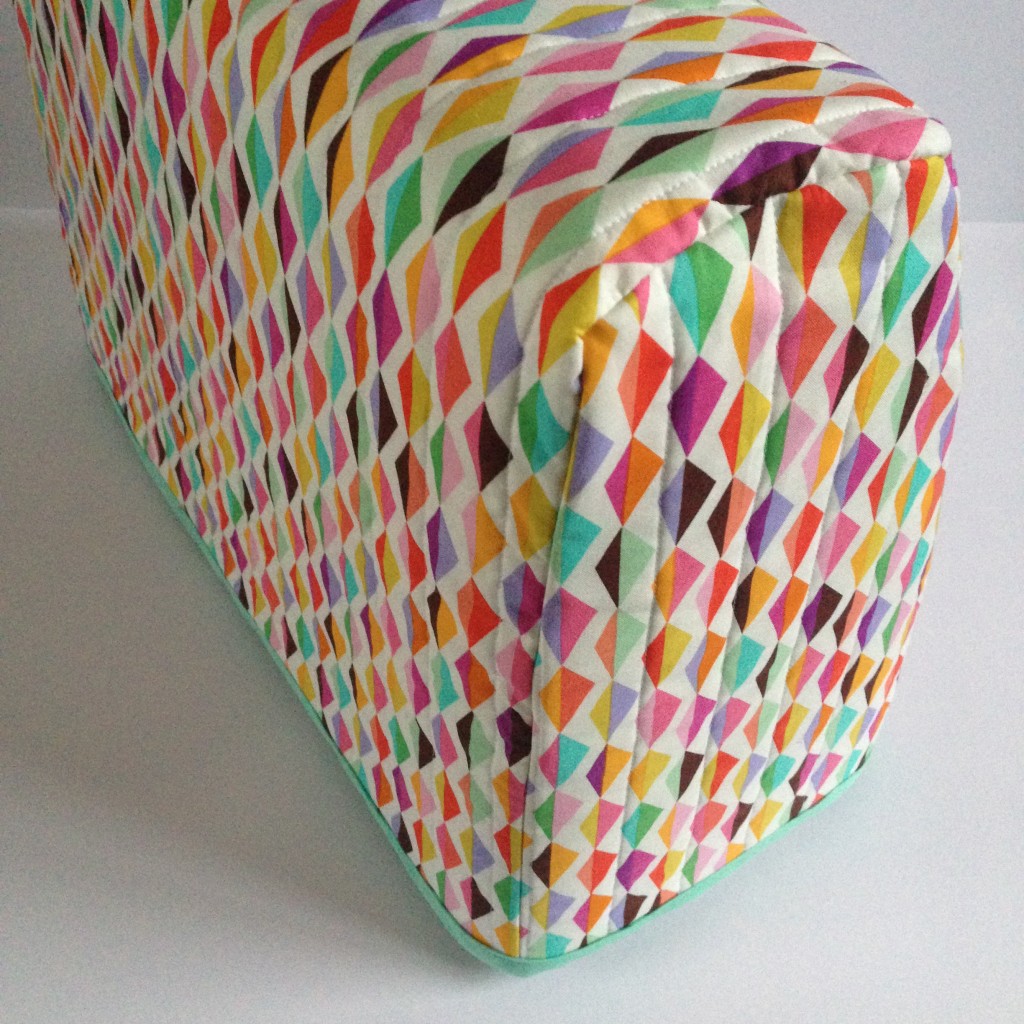
Once all three pieces were quilted, I pinned them (wrong sides together) before stitching. To make the cover fit a little better, I trimmed the excess afterwards.


The final thing to do was to make and attach the bias binding. The tool was really easy to use and it didn’t take as long as I thought! I also got a binding attachment for my machine, but I could not get the hang of it at all when I practised using it…so to save making a complete mess of my cover, I just pressed the binding in half and pinned and stitched it on.

Ta-dah!


I’m so glad that I chose this fabric – it certainly brightened up a very gloomy day today! Hopefully I’ll be able to sew dust free from now on…
Newsletter sign up
Sign up to my newsletter, 'Take time out to be creative' - it only drops in your inbox once or twice a month, and is packed full of creative inspiration.


The fabric is irresistible, no wonder you had to buy it. But you’ve put to great use. Love it!
Thank you Jennie! It was a bit naughty really – I probably should have just used something from my stash instead…but it was worth it! 🙂
Love this! Is there a YouTube tutorial for it? Thank you!
Hey Evonna! I’m sorry, there isn’t a YouTube tutorial for this project. I think I actually made it before I started my channel! I am starting to record again now, so check it out for more creative projects: https://www.youtube.com/hellohoorayblog
Like what I see on your website. I never knew I could gather with my serger. Thank you.
Thank you! You’re very welcome!
Great job! I know you wanted a pretty quilted cover, but wouldn’t it work as well with perhaps 2 layers of plain fabric without quilting? I have several machines to cover. (But a large stash!)