
Little house trinket shelves
[vc_row][vc_column][vc_column_text]I’ve had my eye on these little house shelves for some time now, and have been planning to customise them with pretty fabrics. You can pick them up on Ebay quite easily and I’ve been excited to get around to doing them! 🙂 I painted the houses white a couple of weeks ago, and yesterday I began working on the really fun bit – selecting and sticking in the fabric. These little houses are perfect for storing little trinkets, and I picked fabrics with small prints so that you can see enough pattern in the back.
To make a little house, you will need:
A small wooden house shelf
Some white emulsion or undercoat and a paintbrush
Old newspapers
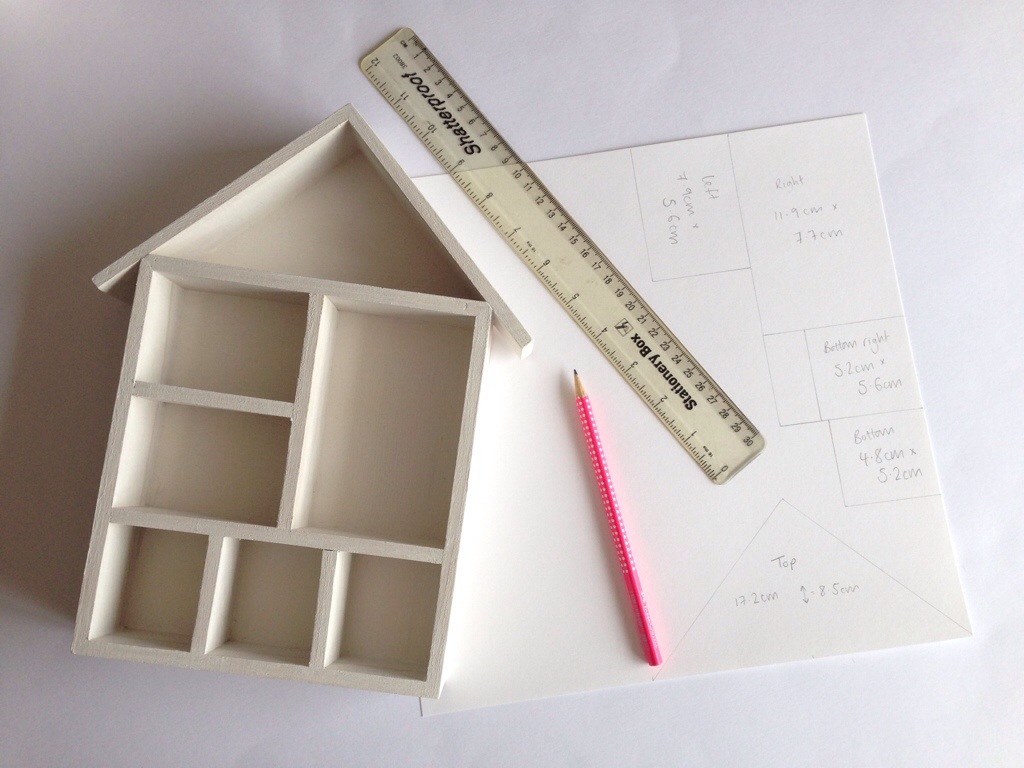
A piece of card and a pencil
A ruler
Scissors
A selection of pretty fabrics
Fabric scissors
Mod podge and another paintbrush

Step 1
Spread out your newspapers and then paint your house with the white paint. I found that the wood soaked up the paint really easily, so I had to do two coats.

Step 2
Once the paint is fully dry, measure the size of each shelf compartment and draw out a template of each shape.
Step 3
Cut out your templates and then choose which fabrics you want to use. Cut out a different fabric for each section using your fabric scissors.


Step 4
Paint some Mod Podge in a section of the house, and then carefully place the fabric inside, smoothing out any lumps and bumps. You may need to trim off any excess – I found that the size at the back was different to the front!

Step 5
Repeat this with the other fabrics and then leave to dry.

I made three houses altogether, and tried to make each one different but tie them together at the same time! I used some of the fabrics on more than one, and used the same selection of solid colours to (sort of) match them. Most of the fabrics I used are by Art Gallery Fabrics – I love the geometric patterns!

The other fabrics I used were by (L-R) Sevenberry, Lewis and Irene and Moda – the middle one was from Plush Addict and the other two (as well as the selection of Art Gallery fabrics) were from The Fat Quarters.

Eventually I’ll hang these up somewhere – possibly in our soon-to-be new kitchen, or maybe in the hall once we’ve decorated it! 🙂

 [/vc_column_text][/vc_column][/vc_row]
Newsletter sign up
Sign up to my newsletter, 'Take time out to be creative' - it only drops in your inbox once or twice a month, and is packed full of creative inspiration.


they are so so sweet!! 🙂
Thank you so much!
Adorable♡
Thank you so much!
These are so so cute! Can imagine them in a nursery for sure.
Thank you!
These are excellent just bought 2 off ebay. Thank you for sharing
No problem! I’d love to see how you get on with this project – feel free to share on my Facebook page or twitter, Valerie! X
I certainly will. Thanks again